AR Rifle
How to Build a Custom AR-15 (Step-by-Step Guide for Beginners)
May
Table of contents
A Custom AR-15 gives shooters control over purpose, fit, and style. That is why the platform remains so popular. It can support range use, hunting, training, and sport shooting. It also gives owners many ways to personalize the rifle.
Some shoppers look for a complete custom AR-15 for sale. Others use an AR-15 customizer to compare parts and layouts. Both options can help beginners understand what matters. A good build starts with knowing the system, not buying random parts.
This guide takes a beginner-friendly approach. We explain the main part groups, basic tools, safe planning steps, and upgrade paths. This does not replace a manufacturer’s manual. It also does not replace a qualified gunsmith.
Use this as a smart starting point. Learn the major parts first. Then shop with more confidence. AR15Discounts.com carries AR-15 parts kits, builder sets, rifle kits, lower build kits, upper parts kits, receiver sets, and upper combo kits.
Why Build a Custom AR-15?
A Custom AR-15 lets you build around your own needs instead of settling for a one-size-fits-all setup. For example, a range rifle may focus on comfort and reliability, while a hunting setup may prioritize weight savings and optic choice. Meanwhile, a precision-style rifle may lean more heavily on stability, trigger feel, and sighting systems.
In addition, customizing gives you more control over your budget. Instead of paying for features you do not need, you can spend more on the parts that matter most. As a result, your money can go toward a better upper receiver, a lighter handguard, or an upgraded charging handle.
Likewise, appearance can play a role for some builders. A custom-painted AR-15 can stand out, while a coordinated finish can help the upper, lower, handguard, and stock look more complete. However, any finish work should preserve markings, controls, and function.
Beyond performance and appearance, building also helps you understand the platform. As you assemble or plan the rifle, you learn how the major groups work together. In turn, that knowledge makes it easier to buy parts later and compare different rifle setups. It also helps when comparing a custom Diamondback AR 15 with a rifle you plan yourself.
Still, building is not always cheaper. In fact, tools, shipping, optics, magazines, and inspection can all add cost. Ultimately, the best reason to build is control, because you decide the final layout from the start.
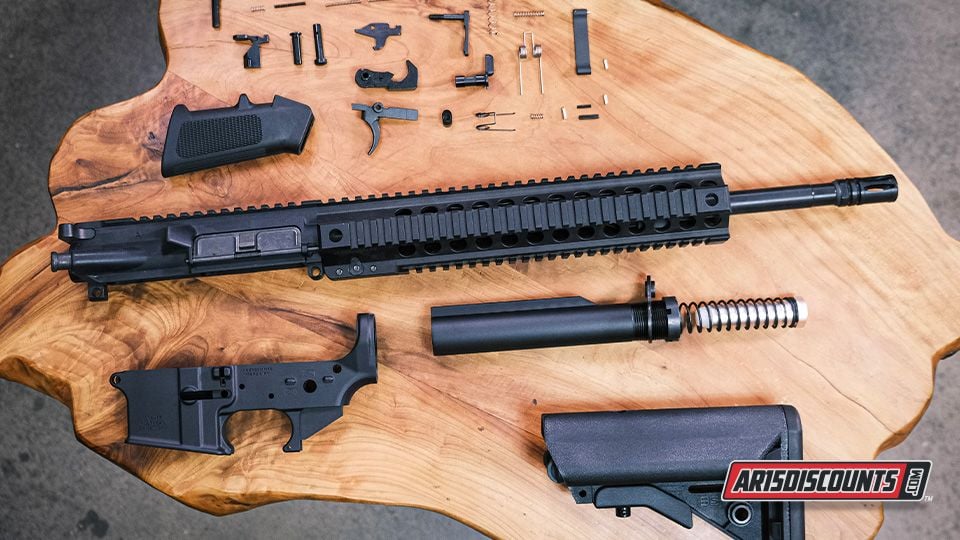
Custom AR-15 Parts Explained
Before planning a Custom AR-15, learn the major parts. Each part has a role. Some parts affect reliability. Others affect balance, comfort, potential for accuracy, or handling.
Knowing the parts also makes shopping easier. It helps you compare kits, uppers, lowers, and parts on AR15Discounts.com. It also helps you understand which parts are worth upgrading first.
Lower Receiver
The lower receiver is the foundation of the rifle. Under federal rules, the lower receiver is generally the controlled firearm. Dealer purchases usually require an FFL transfer.
A custom ar 15 lower can be stripped or complete. A stripped lower gives more parts choice. A complete lower keeps the process simpler. Beginners often prefer complete lowers because they reduce confusion about small parts.
The lower connects with the stock, trigger group, safety selector, and magazine components. It also anchors much of the rifle’s handling feel. Always confirm transfer rules before buying a lower receiver.
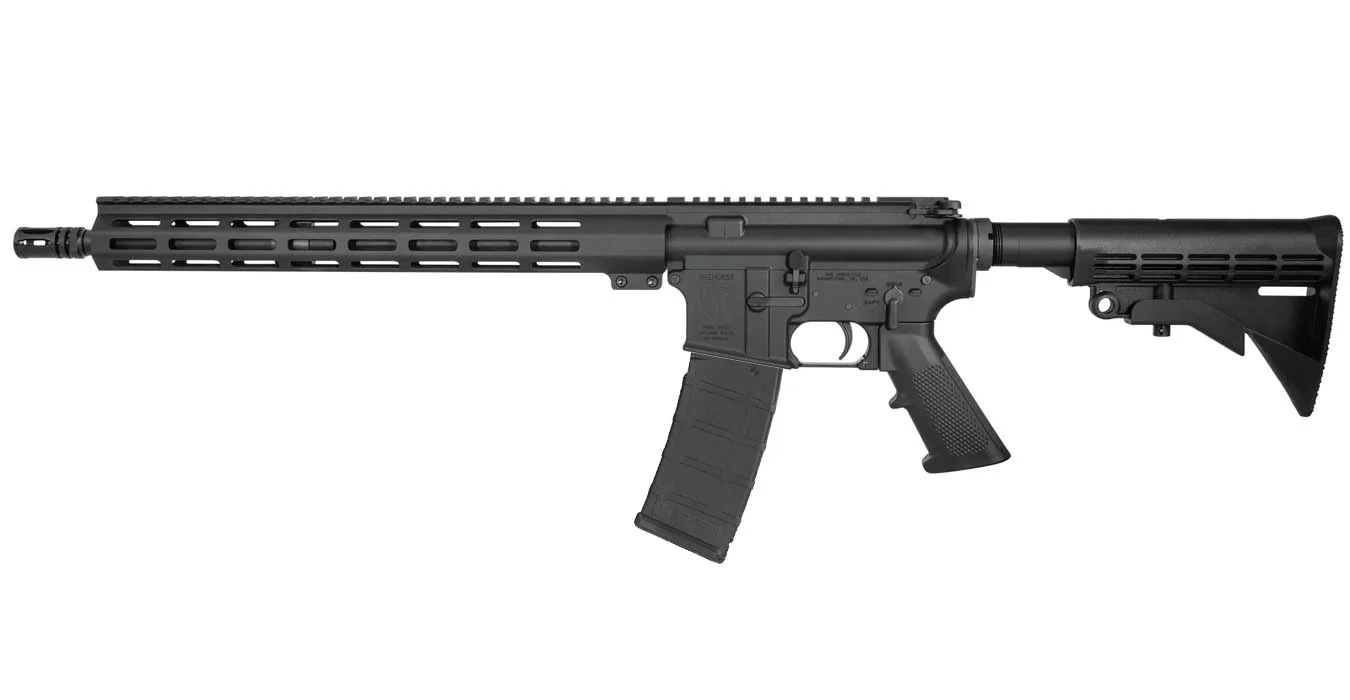
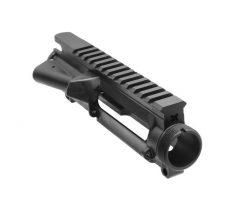
Upper Receiver
The upper receiver forms the top half of the rifle. It supports the barrel, charging handle, bolt carrier group, handguard, and sighting system. In addition, it connects directly with the lower receiver.
For beginners, a complete upper receiver often makes the build process easier. Since it keeps several key parts matched together, it can reduce confusion during the first build. As a result, new builders may avoid common compatibility mistakes.
On the other hand, a stripped upper receiver gives builders more flexibility. It allows them to choose the barrel, handguard, and related parts separately. However, that path also requires more tools, knowledge, and inspection. Therefore, for many beginners, a complete upper is the smarter choice.
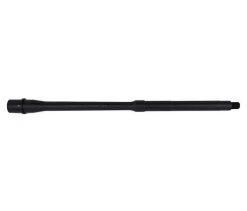
Barrel
The barrel affects caliber, balance, potential for accuracy, and handling. Common beginner chamberings include 5.56 NATO and .223 Remington. Other calibers may fit hunting or specialty builds.
Always confirm compatibility of the barrel, bolt, magazine, and ammunition. Never guess on caliber. If a product listing is unclear, contact the manufacturer or retailer before buying.
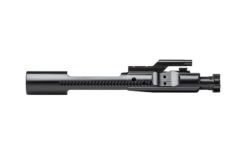
Bolt Carrier Group
The bolt carrier group is often called the BCG. It supports the rifle’s cycling process. It helps with chamber rounds, extracting cases, and resetting the action during operation.
Because reliability is affected, quality matters here. Choose parts from trusted manufacturers. Keep the BCG clean and properly lubricated. Follow the manufacturer’s maintenance guidance.
Charging Handle
The charging handle lets the shooter manually operate the action. It is one of the most common control upgrades. A larger latch may help with gloves or optics.
An ar 15 charging handle custom upgrade can improve handling. A charging handle option can also add style. This is a simple upgrade many owners consider after range time.
Handguard
The handguard surrounds the barrel and provides the support hand with a secure place to hold the rifle. In addition, it can provide mounting space for approved add-ons.
Custom AR-15 handguards can also change the rifle’s weight, balance, and appearance. For example, a slim handguard may feel better for smaller hands, while a longer handguard may offer more support and hand room.
Trigger Group
The trigger group controls the rifle’s firing function. It includes internal parts that affect trigger feel, reset, and control. These parts should be chosen carefully.
Beginners should avoid modifying trigger parts. Use quality components and professional support when needed. A trigger upgrade can improve feel. It should never compromise safety.
Stock and Buffer System
The stock helps stabilize the rifle against the shoulder. It also affects the length of pull, cheek weld, and comfort. A better-fitting stock can make the rifle easier to manage.
The buffer system helps manage cycling and recoil impulse. Beginners should follow product instructions closely. Use a qualified gunsmith when unsure.
Muzzle Device
A muzzle device attaches to the end of the barrel. Common types include flash hiders, compensators, and muzzle brakes. Each type affects the rifle differently.
Laws vary by state. Some areas restrict certain muzzle devices. Check current rules before buying.
Custom AR-15 Tools and Workspace Basics
Good preparation makes any project smoother. First, start with a clean bench and bright lighting. Then keep ammunition away from the work area to reduce distractions and improve safety.
Next, use small trays for loose parts and keep the packaging until you verify each item. Also, avoid mixing springs, pins, or screws. Organization matters because many parts look similar to beginners.
In most cases, common supplies may include safety glasses, screwdrivers, punches, cleaning supplies, oil, and a stable work surface. However, some builds require specialized tools, such as holding blocks, torque tools, or gauges.
The tools you need depend on your parts. For example, a complete upper needs less setup work, while a stripped upper requires more knowledge and support. Additionally, avoid improvised tools because they can damage parts and lead to unsafe outcomes.
Before work begins, read every product manual and follow the manufacturer’s instructions exactly. If the work affects safety, use a qualified gunsmith. This is especially important for barrel, bolt, and trigger-related work.
Ultimately, a smart beginner does not rush. Instead, a safe build starts with careful setup. In addition, a clean workspace makes it easier to notice missing or incorrect parts.
Beginner Build Roadmap To Building A Custom AR-15
This roadmap shows a safe planning order. It does not provide technical assembly instructions. Always use manufacturer manuals and qualified support.
1. Sort the Rifle by Major Groups
Separate parts into the following groups: lower, upper, controls, furniture, sighting, and magazine. This keeps the project organized. It also helps you notice missing parts early.
Group related parts together. Keep small components labeled. Review the packaging before opening everything. If anything looks wrong, stop and verify it.
2. Confirm the Lower Receiver Path
Decide whether you are using a complete lower or stripped lower. A complete lower is easier for beginners. A stripped lower allows more customization.
The lower is also where legal requirements matter most. Confirm all transfer rules before buying. Do not rely on assumptions about state law.
3. Confirm the Upper Receiver Path
Decide whether you are using a complete upper or stripped upper. A complete upper helps reduce compatibility concerns. A stripped upper gives more control.
The upper receiver path affects tools, budget, and inspection needs. Beginners often benefit from using complete upper assemblies. This still leaves room for later upgrades.
4. Match the Bolt, Barrel, and Caliber
Never guess on caliber or part compatibility. Check product markings and manufacturer information. Confirm the barrel, bolt, magazines, and ammunition match.
Stop if anything seems unclear. Contact the manufacturer, retailer, or a qualified gunsmith. Compatibility questions should be answered before using the range.
5. Add Controls and Furniture
Controls shape how the rifle feels. The stock, safety selector, trigger feel, and charging handle all matter. These parts affect comfort and handling.
This is where custom ar 15 parts can improve the rifle. Focus on practical upgrades first. Comfort matters, but safety matters more.
6. Add Sights and Range Gear Last
Do not overload the rifle early. Start with sights or an optic. Then add range gear based on real use.
A clean rifle is easier to learn. You can upgrade after range time. This approach keeps your build focused and easier to manage.
Common Custom AR-15 Upgrades
Not every upgrade has the same value. Start with parts that improve practical use. Then move to appearance upgrades.
| Upgrade | Main Benefit | Priority |
|---|---|---|
| Sights or optic | Better aiming | High |
| Quality magazines | Feeding reliability | High |
| Stock | Fit and stability | Medium |
| Charging handle | Easier handling | Medium |
| Handguard | Grip and balance | Medium |
| Trigger group | Improved feel | Medium |
| Custom paint | Appearance | Low |
A custom Diamondback AR 15 search can provide ideas. So can browsing custom AR-15 rifles for sale. Those examples can show different layouts, finishes, and accessory choices.
Still, do not blindly copy another setup. Your rifle should match your own use. A lightweight build should not carry extra parts it does not need. A range build may prioritize comfort and sighting options.
Customizing AR-15 rifles works best with range feedback. Shoot safely first. Upgrade after you learn what needs improvement. That keeps your money focused on parts that actually help.
Safety and Legal Notes
A Custom AR-15 must be safe and lawful. Federal, state, and local laws may all apply. Some states regulate features, transfers, magazines, serialization, or privately made firearms.
Check current laws before buying parts. Speak with a qualified attorney for legal advice. Use an FFL when required. Keep records where appropriate.
Avoid illegal firearm builds or modifications. Serial numbers must remain intact. Restricted conversions are unlawful and unsafe. For legal questions, rely on current laws, official guidance, or a qualified attorney instead of internet comments.
Before range use, confirm the firearm is unloaded. Keep it pointed in a safe direction. Keep your finger off the trigger until ready to shoot. Use eye and ear protection at the range.
Stop immediately if anything feels wrong. A qualified gunsmith inspection is smart for first-time builders. It is also smart after major parts changes.
This article is for general education. It is not legal advice. Always follow manufacturer manuals and local rules.
FAQ’s About Custom AR-15 Rifles
Building a Custom AR-15 often brings up plenty of questions, especially for first-time buyers. To help, the answers below cover common concerns about parts, cost, tools, caliber, customization, and legal basics. Use them as a starting point before you shop for parts, compare options, or plan your build.
You need a lower receiver, an upper receiver, a barrel, a handguard, a bolt carrier group, a charging handle, a stock, a trigger group, sights, and magazines. Many builds also use lower parts kits and upper parts kits.
It depends on your parts and tools. A complete rifle may cost less. A Custom AR-15 gives more control over features and upgrades
Federal law may allow certain personal builds by non-prohibited people. State laws may differ. Always check current rules before buying parts.
It depends on the build path. Complete uppers and lowers are simpler. Stripped builds require more tools, knowledge, and inspection.
Tool needs vary by parts. Common supplies include safety glasses, punches, screwdrivers, holding tools, and cleaning supplies. Follow all manufacturer instructions.
Time depends on experience and part choices. Planning may take longer than the work. Beginners should focus on safety, not speed.
Many beginners choose 5.56 NATO or .223 Remington. Other calibers may fit hunting or specialty use. Always confirm part compatibility.
Many parts can be customized. Popular choices include stocks, handguards, charging handles, triggers, optics, and finishes.
Start with sights or an optic, quality magazines, and comfortable furniture. Then consider a handguard, trigger, or charging handle.
No. Laws vary by state and locality. Some states restrict features, parts, transfers, or privately made firearms.
Conclusion
A Custom AR-15 starts with a clear plan. Learn the part groups first. Then choose a lower path, upper path, controls, furniture, and sighting system.
Keep your first build simple. Focus on safety, reliability, and legal compliance. Use complete parts groups when they make sense. Get qualified help when work affects safe operation.
When you are ready to start, shop all your AR-15 parts at AR15Discounts.com. You can find custom ar 15 parts, kits, uppers, lowers, handguards, charging handles, and upgrades in one place.
For additional support, check out our sister site at www.dirtybirdusa.com.