AR-15 Barrels, Ballistic Advantage
Ballistic Advantage Barrels: Best Accessories to Boost Performance
Oct
Table of contents
- What muzzle device (brake, compensator, flash hider) pairs best with my Ballistic Advantage barrel?
- Do I need an adjustable gas block with my Ballistic Advantage barrel, and when is it necessary?
- What muzzle thread pitch and adapters are required to mount a suppressor or aftermarket muzzle device on my Ballistic Advantage barrel?
- Ready to finish your Ballistic Advantage build? Finalize your upper with confidence.
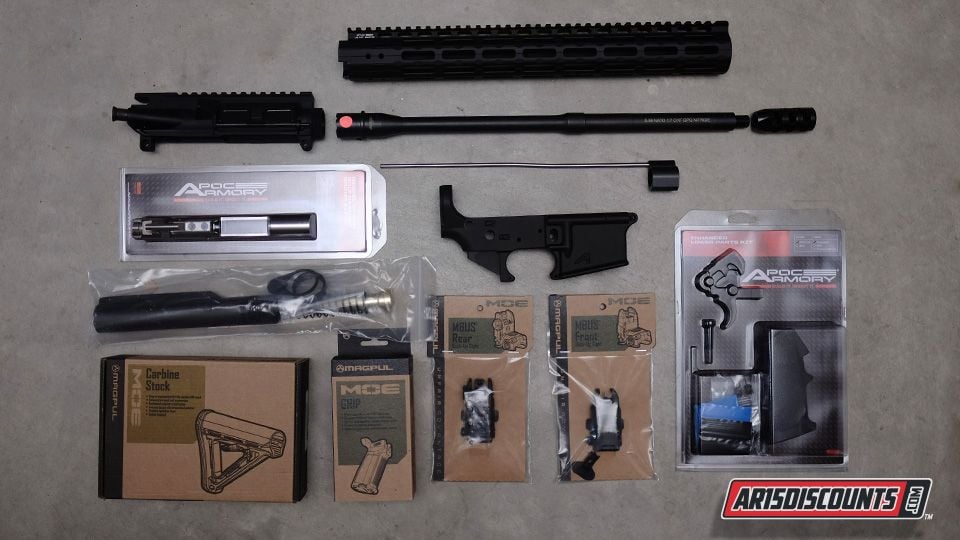
If you’re building or upgrading an AR-15 platform, the name Ballistic Advantage often comes up—and for good reason. Their barrels, uppers, lowers, and components are renowned for their precision, reliability, and value. But selecting and installing a Ballistic Advantage barrel—or building a complete upper around it—raises a host of practical questions: which muzzle device pairs best, do you need an adjustable gas block, what handguard fits, what gas tube do you choose, how to torque and time for optimal accuracy, and which support components (BCG, trigger, optics) make the most difference. In this guide, you’ll find clear, practical answers to all these FAQs, plus tips for maximizing performance with your ballistic advantage barrel or ballistic advantage upper. By the end, you’ll be able to pick the right components for your intended use confidently—and find Ballistic Advantage barrels in stock on sale at AR15 Discounts.
What muzzle device (brake, compensator, flash hider) pairs best with my Ballistic Advantage barrel?
Choosing between a muzzle brake, compensator, or flash hider primarily depends on how you intend to use your build (competition, range, defense, or suppressed). Here’s how to think it through, especially when pairing with a Ballistic Advantage barrel.
Flash Hider / A2 / Hybrid
- Best choice for general-purpose or field use, especially where recoil reduction or muzzle flash suppression is more desirable than recoil mitigation.
- Compatible with standard 1/2×28 threading (common on BA barrels). For example, many Ballistic Advantage barrels come with 1/2×28 threads.
- Simple, robust, and low maintenance. Less stress on the barrel and components compared to a full brake when shooting suppressed or suppressed builds.
Muzzle Brake
- Ideal if recoil reduction is a priority (e.g., for faster follow-up shots). It vents gas outward or sideways to counter recoil.
- Downsides: heavier concussion to the shooter and bystanders, more dust signature in prone, possibly more stress on the barrel shoulder and timing.
- Brakes are most beneficial on heavier loads or calibers (e.g., .300 BLK, even though suppressed use is everyday).
- If you choose a brake, use a high-quality design that aligns well and doesn’t “walk” the point of impact.
Compensator
- A middle ground: reduces vertical climb or muzzle rise. Suitable for rapid follow-up work (e.g., 3-gun style).
- Avoid overly aggressive comp designs unless your barrel and components are rated to handle the extra stress.
- On a ballistic advantage barrel, make sure your muzzle device choice doesn’t disturb harmonics or induce point-of-impact (POI) shifts unpredictably.
Suppressor considerations
- If you’re going suppressed, you’ll want a muzzle device rated for direct-attach (e.g., QD) or a quick-detach adapter.
- Many shooters pair a flash hider or brake with a suppressor mount or 1/2×28 to .578 or QD adapter.
- Always headspace and torque your muzzle device properly to preserve accuracy and reliability.
Bottom line: for general-purpose and reliability, a flash hider or hybrid is a safe, low-drama choice. If you prioritize recoil mitigation (or run heavier calibers), a brake or comp can help—choose quality and ensure it’s properly installed and timed.
Do I need an adjustable gas block with my Ballistic Advantage barrel, and when is it necessary?
An adjustable gas block is not always necessary, but it has advantages in specific scenarios. Here’s how to decide when it’s useful—and when you can skip it without sacrificing reliability.
When is an adjustable gas advantageous?
- Suppressor use / suppressed builds: Suppressors increase backpressure, which can over-gas your system. An adjustable gas block allows you to adjust the gas flow, preventing the BCG from cycling too violently. In practice, many builders install a quality adjustable gas block (e.g., Superlative Arms) when planning to shoot suppressed.
- Tuning across ammunition types: If you might shoot light loads, heavy loads, or a variety of bullet weights, an adjustable gas block gives you the flexibility to tune for smooth cycling, reduced recoil, and less wear.
- Minimizing noise and wear: By fine-tuning gas, you can reduce the “harshness” of cycling, improve parts longevity, and smooth the recoil impulse (less muzzle flip, better brass condition).
- High-performance builds: If you run a more extended handguard, sling, or accessories, or have design constraints, the extra tuning flexibility helps maintain reliability under varied conditions.
When you probably don’t need one
- Standard builds with common loads: If your barrel (e.g., a Ballistic Advantage barrel) is matched to a mid-length or carbine gas system and you’re using standard factory ammo, a fixed lo-pro gas block (sized adequately to the gas port) is likely sufficient.
- Simplicity and reliability priority: Fewer moving or adjustable parts reduce failure modes. A quality fixed gas block, properly aligned and torqued, can offer decades of reliable service.
- Cost and alignment complexity: Good adjustable blocks are more expensive and require precise alignment. If you’re not suppressing or tuning, the benefit may not be worth the trade-off.
Most ballistic advantage barrel reviews and specifications show fixed, low-profile, or standard gas blocks on their barrels, unless suppressed tuning is specifically anticipated.
Tips for choosing
- Use the correct gas block diameter: standard sizes are .625″, .750″, .875″, and .936″ (BA offers these in their parts catalog).
- Consider bleed-off vs. solid adjustable designs: bleed-off allows gas venting even in the closed position (safer for undergassed runs).
- Always lock and safety-wire, or otherwise secure, set screws or adjustment screws.
If your use case includes the use of suppressors or cooking with multiple load types, installing an adjustable gas block is recommended. Otherwise, fixed is simpler and reliable.
How do I choose the correct free-float handguard length and mounting system for my Ballistic Advantage barrel length?
The handguard length and mounting style should strike a balance between coverage, weight, cooling, and rigidity, all while avoiding interference with the barrel or muzzle device. Let’s break down how to choose a ballistic advantage barrel.
Matching handguard to barrel length & gas system
A general rule: your handguard should extend close—but not over—the gas block region, giving maximum leverage and accessory space without contacting the muzzle device or baffle. For example:
- Pistol-length barrels (e.g., 8.3″ .300 BLK) typically use shorter 7–9″ handguards.
- Carbine or mid-length barrels (e.g., 10.3″ to 16″) often feature 12–15″ handguards that extend close to, or even beyond, the gas block.
- Longer barrels (18″, 20″, 24″) may use longer 15–18″ handguards to provide full coverage.
Your choice should avoid hugging the barrel so tightly that heating or harmonics distort performance. The handguard should allow unobstructed access to the barrel’s gas block if adjustment or maintenance is needed.
Mounting system: Key considerations
- Barrel nut + direct-to-barrel vs. monolithic rail: Standard handguards mount to a robust barrel nut independent from the receiver. Monolithic rails or one-piece upper/rail designs can add rigidity but reduce modularity.
- Torque and alignment: Always torque the barrel nut to spec and index the handguard (orient properly). Use the recommended torque and ensure that there is no binding of the gas tube, delta ring, or rails.
- Low-profile/free-float system: A free-float handguard ensures that nothing touches the barrel (except at the gas block) — ideal for preserving accuracy.
- Mounting points: Consider whether you want M-LOK, KeyMod, or Picatinny sections. M-LOK is now common and lighter, and many handguards offer pic rails at 3, 6, 9, and 12 o’clock positions.
Example with Ballistic Advantage
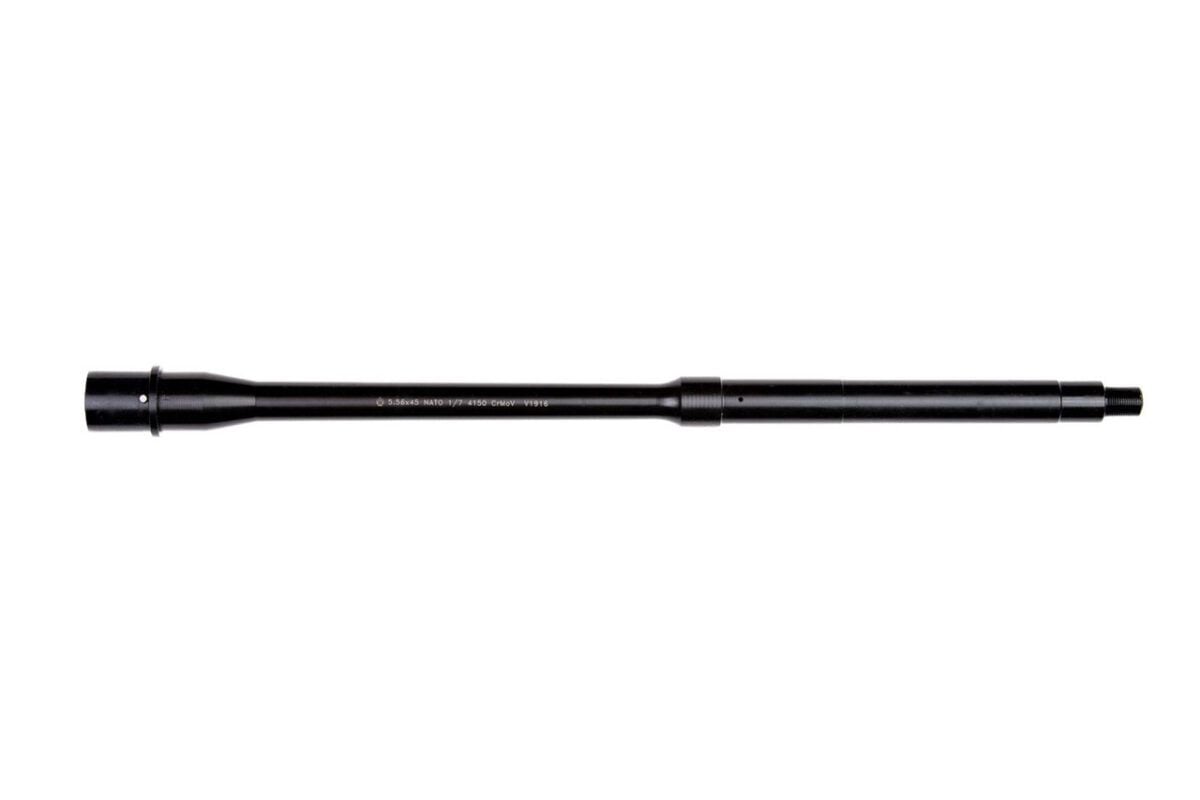
Suppose you select a 16″ Ballistic Advantage Hanson Mid-length barrel with a mid-length gas system and 1/2×28 muzzle threads. You might choose a 15″ free-float M-LOK handguard that extends just past the gas block, leaving room at the front for your muzzle device. The handguard’s barrel nut should be torqued and aligned so the rails are level with the bore.
In another case, a 10.3″ BA barrel might pair with an 8″ rail, keeping the front of the handguard clear of the muzzle device. Many ballistic advantage barrels in stock listings show gas block journals (e.g., .750″) to guide compatibility.
Bottom line: match handguard length to the barrel/gas system, choose a robust mounting system (free-float, good barrel nut), and plan torquing and alignment carefully to avoid stress or contact with the barrel.
Which gas tube length (pistol, carbine, mid, rifle) should I use with my Ballistic Advantage barrel and gas system?
Your gas tube length must correspond to your barrel’s gas system (pistol, carbine, mid, rifle) to reliably tap gas and cycle the action. Using the wrong length can yield under- or over-gassing, or outright failure to cycle.
Gas system definitions
- Pistol length: very short length, used on short-barreled (e.g., sub-10″) builds.
- Carbine length: for barrels ~10–16″ in many carbine configs.
- Mid-length: a slightly longer tube, common in 14–18″ barrels, to reduce dwell pressure.
- Rifle length: used for long-barrel, rifle-length gas systems (e.g., 18–20″+).
Ballistic Advantage classifies its barrels by intended gas length (e.g., their mid-length barrels receive mid-length gas systems).
Matching the gas tube to the barrel
- Start with the barrel’s gas system designation. If your BA barrel is tuned for mid-length, use a mid-length gas tube.
- Check dwell time and port location. The gas port hole must align with the gas tube; if the tube is too short, it won’t reach the port—no cycling. If too long (extending beyond the port), it may upset timing or contact the front sight/mechanism.
- Account for suppressor/backpressure. Some suppressor setups increase backpressure; if you’re tuning, you may need to experiment with the gas block setting.
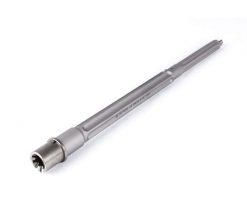
- Material and quality: Use good gas tubing materials (stainless or melonite) that resist erosion over time.
Examples
- A 16″ mid-length Ballistic Advantage barrel would use a mid-length gas tube to match dwell time and pressure.
- A 10.3″ BA carbine barrel is likely to use a carbine-length gas tube.
- If the barrel is configured for a pistol-length gas system, use a corresponding pistol-length tube.
Always triple-check that the tube length is correct before assembling, and that nothing contacts it when torqued or installed.

What muzzle thread pitch and adapters are required to mount a suppressor or aftermarket muzzle device on my Ballistic Advantage barrel?
Correct muzzle threading and adapters are critical. While many BA barrels share standard specifications, always verify your specific barrel’s thread pitch before purchasing a muzzle device.
Common muzzle thread specs
- 1/2×28 – very common on .223/5.56 and some .300 BLK barrels. Many Ballistic Advantage barrels use this thread.
- For larger calibers or precision barrels, BA may offer different thread rates such as 5/8×24
Using suppressor adapters
- If your barrel is 1/2×28 but you want to mount a suppressor with a different thread interface (e.g., .578 or QD), you can use a properly machined adapter or muzzle device with matching threads.
- For example, a QD mount with .578×28 female threads can screw onto a 1/2×28 male barrel thread via a step-up adapter (verify pitch, alignment, and lock mechanism).
- Always ensure your adapter or muzzle device is rated for the pressures and dimensions of your caliber.
Crush washers, shims, and timing
- Use a proper crush washer, shims, or an appropriate torquing scheme to ensure your muzzle device lands pointed correctly.
- Loose or misaligned adapters can degrade accuracy or even loosen under firing.
Summary
- Check the barrel’s thread spec in the listing (most BA barrels are 1/2×28).
- Choose muzzle devices or suppressor mounts that match or adapt to that thread.
- Use torque and alignment devices (washers/shims) to time the device correctly.
- Ensure the adapter is rated for the caliber and service you’ll run.
Which bolt carrier group and gas key spec are recommended to ensure reliable function with my Ballistic Advantage barrel?
Your bolt carrier group (BCG) and gas key (with proper staking) are crucial for reliable cycling, longevity, and safety when paired with a ballistic advantage barrel.
Recommended BCG qualities
- Full-auto rated profile (regardless of semi-auto use)—stronger material and geometry.
- MPI/HP tested components: ensure your BCG is normalized, magnetic particle inspected, and correctly set up to handle pressures.
- Properly staked gas key: Lock the gas key screws or use weld staking to prevent them from backing out during firing.
- Chrome-lined or coating (NiB, NP3, etc.): better corrosion resistance and smoother cycling.
- Carrier gas port alignment: Ensure the gas key aligns with the carrier’s gas port, with no offset.
Ballistic Advantage’s own parts catalog offers BCGs and related upper components.
Gas key spec & gas port tuning
- The gas key should have a .110″ or .125″ gas port (standard).
- If using an adjustable gas block, cycle counts and dwell control affect how hard the BCG hits the buffer; under- or over-gassing must be avoided.
Pairing to your barrel
- For a ballistic advantage, use a 300 Blackout upper and a BCG rated for .300 BLK (the same BCG as 5.56, but ensure compatibility is maintained).
- For builds running suppressed or with aggressive gas, a more robust carrier and proper key staking are essential to maintain reliability.
A well-built BCG, matched to your barrel, ensures you avoid malfunctions, key failures, or gas system issues.
What optics and mount height work best with my Ballistic Advantage barrel for close-quarters, mid-range, or long-range roles?
Choosing the right optic and mount height ensures proper co-witness, clearance (especially under rails or handguards), and alignment with your intended shooting distance.
Close-quarters / CQB (0–200 yards)
- Red dot/reflex sights at low 1/3 cowitness or lower 1/3.
- The mount height, typically around 1.2–1.5 inches above the bore, is standard to clear the handguard and gas tube.
- Lightweight, simple, fast acquisition setups are ideal.
- A backup magnifier (3×) may be included for extra reach without changing optics.
Mid-range (200–600 yards)
- Low-power variable optics (LPVOs) 1–6×, 1–8×, or 1–10×.
- Mount height may shift to 1.5–1.7″ above bore or absolute co-witness, depending on your buffer tube and lower rail height.
- Use mount bases compatible with AR flats or an integrated Pic rail on your upper.
- Ensure you have eye relief and zero retention.
Long-range (600+ yards)
- Precision optics (e.g., 3–18×, 5–25×) with durable mounts (e.g., 34mm, 35mm, or MIL-STD rings).
- Elevated mounts may be necessary to clear handguard/rail systems.
- Look for mount systems that allow repeatable zero after removal (e.g., QD rings, return-to-zero mounts).
- Zero height, ballistic drop compensation, and target turrets become key.
Considerations with Ballistic Advantage barrels
- The height of the gas block or handguard may impose constraints; choose magnifier or mount offsets accordingly.
- Ensure your optic’s FOV (field of view) is not overly impacted by rail height above the bore.
- Don’t let rail sag, flex, or widen compromise your alignment—use quality one-piece rails or properly torqued mounts.
In short: for CQB, low red-dot heights; for mid-range, typical LPVOs; for long-range, precision optics with elevated or return-to-zero mounts. All should clear the handguard or gas system associated with your BA barrel.
Should I upgrade the trigger and charging handle when building around a Ballistic Advantage barrel, and which options improve performance most?
While not strictly required, upgrading your trigger and charging handle can meaningfully enhance the shooting experience, especially with a high-quality ballistic advantage upper.
Trigger upgrades
- Match or two-stage triggers (e.g., Geissele, Timney, CMC) give a crisper, lighter pull than typical mil-spec triggers.
- These upgrades reduce shooter error and allow for more consistent trigger presses under recoil or stress.
- Choose models rated for duty/competition use rather than economy strips.
- Always follow safety and installation guidelines—poor trigger installation can be dangerous.
Charging handle upgrades
- Extended latch charging handles or ambidextrous designs (e.g., BCM, Radian, Geissele) offer improved ergonomics, especially when using mounted optics or performing one-handed tasks.
- Ambi or oversized latches allow faster manipulation without breaking grip.
- Choose heavy-duty models that don’t flex or bind under use.
While the ballistic advantage is lower, supplementing with an upgraded trigger and charging handle elevates the whole system. These upgrades don’t directly affect barrel accuracy, but they enhance shooter control, follow-up speed, and reliability under stress.
What handguard accessories—lights, grips, sling mounts, rail sections—are compatible without negatively affecting barrel harmonics or cooling?
Adding accessories is tempting, but in a precision build—even with a ballistic advantage barrel—you must strike a balance between utility and performance.
Principles to keep in mind
- Avoid over-clamping or torque stress: Don’t overtighten accessory mounts that pinch or distort the handguard.
- Even weight distribution: Keep heavy accessories centered to reduce cantilever effects.
- Use low-profile mounts: M-LOK offsets, lightweight rail sections (e.g., 1-slot width) are preferred.
- Limit contact with the barrel: Accessories should mount only to the handguard, not the barrel (unless your design intentionally allows barrel-mounted bipods or similar accessories).
- Thermal management: Lights, lasers, and other devices generate heat. Avoid stacking them directly over the barrel mid-length; consider side mounts or offset positions.
- Do not block gas vents or ports: Make sure accessory placement doesn’t impede barrel cooling or interrupt airflow.
Types of compatible accessories
- M-LOK or KeyMod sections: small rails you can mount where needed (1, 3, or 5 slot sizes).
- Sling mounts / QD sockets: low-profile flush or swivel sockets.
- Grip modules or angled grips are attached under the barrel nut or guard with minimal interaction with the barrel.
- Compact lights/pressure switches: mount them near the handguard ends or on the side panels to avoid heat buildup over the barrel.
When accessories are properly mounted away from the barrel surface, harmonics and cooling are minimally impacted—especially on well-made barrels such as those from Ballistic Advantage.
How should I torque the barrel nut and time the gas block during installation to preserve accuracy and reliability with my Ballistic Advantage barrel?
Proper torque and timing are critical final steps that directly influence accuracy, reliability, and safety for your ballistic advantage barrel installation.
Barrel nut torque
- Use a high-quality barrel nut (typically included with many AR parts kits or upper assemblies).
- Tighten in stages—start at ~30 ft-lb, then ~60 ft-lb, then final torque (often 80–100 ft-lb depending on your upper kit).
- Use a torque wrench on an arm or adapter to transfer torque correctly (do not rely on the barrel shank to twist).
- Place the upper in a vise using proper tooling, clamping on the receiver—not the barrel.
Gas block alignment & timing
- Before fully tightening, center the gas block over the gas port to ensure alignment. Use the upper receiver as a reference to keep it square. Ballistic Advantage’s install FAQ recommends centering with the upper before torquing.
- After alignment, torque the gas block screws to the specified torque (typically 15–25 in-lbs, depending on the block). Use blue Loctite or safety wire if recommended by the manufacturer.
- If your muzzle device or adapter shifts POI, adjust using shims or washers to time the device correctly. Secure it in place.
Gas tube check & test
- Before finalizing, insert your selected gas tube (of the correct length) and ensure there’s no contact, binding, or interference.
- Cycle by hand and verify the BCG moves freely and returns as intended.
- Perform an initial break-in (typically 100 rounds or so of mild loads) while checking headspace and function before progressing to hotter loads.
Why this matters
If the barrel nut is under- or over-torqued, the barrel’s alignment can shift slightly, altering the point of impact and especially accuracy. Misaligned gas blocks or improper timing can cause stress to your gas system or lead to malfunctions.
By following proper torque steps, centering, and timing, you protect your accuracy and ensure your ballistic advantage barrel lives up to its potential.
General-purpose: flash hider or hybrid. Recoil control: brake/comp. Suppressed: the suppressor’s compatible mount. Pick for your priority (flash, recoil, or QD).
Not required for most unsuppressed builds using standard ammo. It’s helpful for suppressed use or when tuning for diverse loads.
Match rail length to cover the gas system without contacting the muzzle device, and use a rigid free-float, M-LOK handguard with the correct barrel nut.
Use the tube that matches the barrel’s specified gas system (pistol/carbine/mid/rifle). Never mix lengths.
Most 5.56 BA barrels use 1/2×28; many .30-cal barrels use 5/8×24. Choose devices/adapters that exactly match your barrel’s thread and suppressor interface.
A full-auto profile, properly staked gas key, and MPI/HP-tested components from a reputable brand ensure consistent function.
CQB: red dot (lower 1/3). Mid-range: LPVO (1–6×/1–8×). Long-range: precision scope with a robust, repeatable mount at an appropriate height for your cheek weld.
Yes—quality two-stage/clean single-stage triggers and ambi/extended charging handles improve control, speed, and ergonomics.
Use lightweight, low-profile M-LOK accessories; keep all attachments on the handguard (not the barrel) and avoid blocking ventilation slots.
Follow the manufacturer’s torque specs and alignment procedures, verify gas block centering over the port, and confirm smooth, interference-free cycling. When in doubt, consult a qualified gunsmith.
Ready to finish your Ballistic Advantage build? Finalize your upper with confidence.
Find the exact parts you need—shop barrels, matched uppers, full-auto-profile BCGs, and muzzle devices to complete a reliable, accurate upper. Popular Ballistic Advantage options are available at AR15 Discounts. Select the correct contour, gas system, and finish. Add the parts to your cart and complete your build with confidence today.
Additional resources, www.arbuildjunkie.com